Save to Pinterest
 My kitchen smelled like a citrus grove the morning my neighbor dropped off a bag of fresh oranges from her tree, and I knew immediately what I had to make. These overnight orange rolls came together almost by accident that day—I'd been craving something bright and pillowy soft, something that would make the whole house smell like sunshine before anyone even woke up. The beauty of preparing them the night before is that you're not rushing through steps in the morning, just sliding a tray into the oven and letting the magic happen while you pour coffee. What started as a way to use up those oranges became my go-to breakfast formula whenever I want to impress without the stress.
I'll never forget the first time I served these to my book club on a lazy Saturday morning—everyone arrived expecting store-bought pastries, and when they bit into the warm, citrusy softness, the whole conversation shifted. One friend actually closed her eyes after the first bite, and that's when I realized this recipe had something special. That morning taught me that good food does more than fill your stomach; it changes the whole mood of a gathering.
Ingredients
- All-purpose flour (3 1/2 cups): The foundation of tender, fluffy rolls—make sure it's spooned and leveled, not scooped straight from the bag, or you'll end up with dense dough.
- Instant dry yeast (2 1/4 tsp): This is what makes overnight rising possible; it works steadily while your rolls chill in the fridge.
- Whole milk (3/4 cup, lukewarm): Lukewarm is the key word here—too hot kills the yeast, too cold and it wakes up sluggishly.
- Unsalted butter (1/4 cup melted for dough, 1/4 cup softened for filling): The melted butter in the dough creates richness, while the softened butter in the filling spreads easily and holds the sugar and zest.
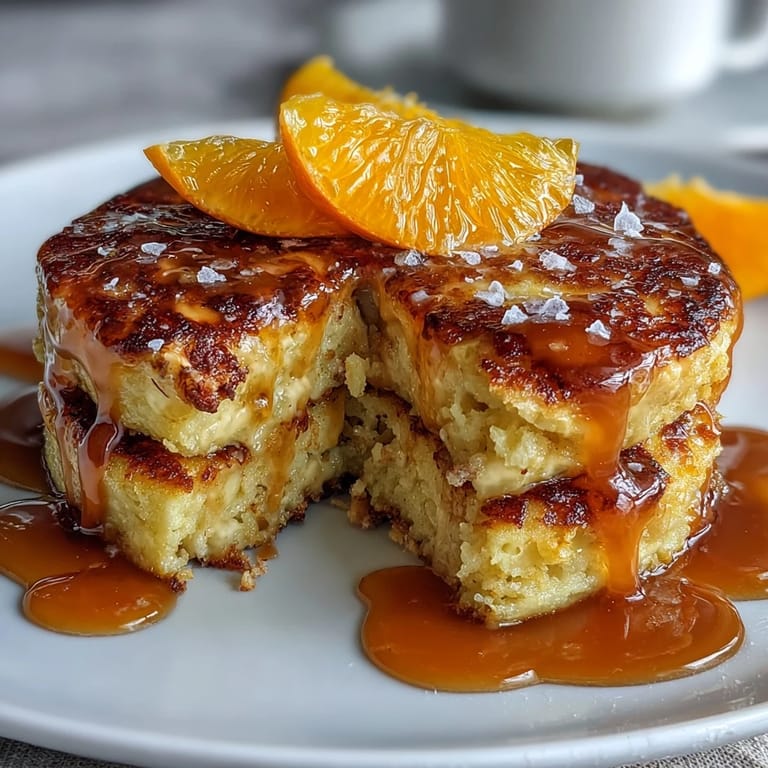
- Fresh orange zest (3 total from 3 large oranges): This is not negotiable—bottled zest tastes like cardboard compared to the real thing, and the oils in fresh zest are what make these rolls sing.
- Granulated sugar (1/2 cup for filling): The sugar caramelizes slightly as the rolls bake, creating those gorgeous golden edges.
- Large eggs (2, room temperature): Room temperature eggs blend smoothly into the dough and create a tender crumb structure.
- Powdered sugar (1 cup for glaze): Mixed with fresh orange juice, this becomes a glaze that sets to a soft, glossy finish.
Tired of Takeout? 🥡
Get 10 meals you can make faster than delivery arrives. Seriously.
One email. No spam. Unsubscribe anytime.
Instructions
- Mix Your Dry Goods:
- In a large bowl, whisk flour, sugar, yeast, and salt together until everything is evenly distributed, breaking up any clumps in the yeast with the back of your whisk. This prevents pockets of inactive yeast scattered through your dough.
- Combine the Wet Ingredients:
- In another bowl, whisk together the warm milk, melted butter, eggs, and orange zest until everything is well combined and the zest is suspended throughout. The orange zest will brighten immediately as you whisk.
- Bring It Together:
- Pour the wet mixture into the dry mixture and stir with a wooden spoon until a shaggy, sticky dough forms—it should look rough and hold together, but still be quite wet. Don't overthink this step; you're just combining ingredients.
- Knead Until Smooth:
- Turn the dough onto a lightly floured surface or use a stand mixer with the dough hook attachment and knead for 7–8 minutes until the dough is smooth, elastic, and springs back when you poke it. You'll feel the transformation under your hands as the flour hydrates and the gluten develops.
- Let It Rise Warm:
- Place the kneaded dough in a greased bowl, cover loosely with plastic wrap, and let it sit in a warm, draft-free spot for 1–2 hours until it's noticeably puffed up and roughly doubled in size. A warm corner of your kitchen, near a sunny window, or even inside your oven with the light on works well.
- Shape Your Rolls:
- Punch down the dough gently to release some air, then turn it out onto a lightly floured surface and use a rolling pin to shape it into a 10x16-inch rectangle—it doesn't need to be perfect. You'll be able to feel when the dough is the right thickness: it should be about 1/4-inch thick, thin enough to roll but thick enough to stay together.
- Add the Filling:
- Spread the softened butter across the entire rectangle, then sprinkle evenly with sugar and orange zest, leaving a tiny margin around the edges. The butter acts as a barrier that helps the sugar stay moist and creates those caramelized layers as the rolls bake.
- Roll Tightly and Cut:
- Starting from the longer 16-inch edge, roll the dough tightly into a log, then use a sharp knife or clean dental floss to cut it into 12 even pieces. Dental floss works brilliantly because it slides through dough without crushing it, creating clean edges.
- Arrange and Chill Overnight:
- Place the rolls cut-side up in a greased 9x13-inch baking dish, cover tightly with plastic wrap, and refrigerate overnight (or up to 16 hours). The cold slows yeast activity, so the rolls rise slowly and develop a better flavor—this is actually the secret weapon for overnight rolls.
- Bring to Room Temperature:
- The next morning, remove the rolls from the fridge and let them sit at room temperature for 45–60 minutes, covered loosely with plastic wrap, until they're puffy and you can see them pressing gently against each other in the pan. They should look noticeably risen but still hold their shape slightly.
- Bake Golden:
- Preheat your oven to 350°F (175°C) while the rolls are finishing their rise, then bake for 22–25 minutes until the tops are golden brown and the rolls sound slightly hollow when you tap them. The kitchen will smell absolutely incredible at this point.
- Glaze While Warm:
- While the rolls are baking, whisk together powdered sugar, fresh orange juice (2–3 tablespoons), and orange zest until you have a smooth, pourable glaze that's thin enough to drizzle but thick enough to cling slightly. Drizzle it generously over the warm rolls straight from the oven, allowing it to pool and set slightly.
 Save to Pinterest
 There was a moment last winter when my teenage daughter came downstairs, smelled these rolls baking, and didn't immediately disappear into her room with her phone—she actually sat at the kitchen table and we talked while they cooled. These rolls have become the thing that brings people together in my house, more reliable than any other recipe I know.
The Overnight Rise Magic
The reason overnight rolls work so much better than their same-day cousins is simple chemistry: cold fermentation develops flavor and improves texture. When you let dough rise slowly in the fridge, the yeast works steadily but gently, which means the dough has time to develop complex flavors and a more tender crumb. I learned this the hard way by trying to rush the process once, and the rolls came out good but tasted a bit flat compared to the slow-fermented version.
Why Fresh Orange Zest Changes Everything
The first time I made these with bottled zest instead of fresh, my friend asked if something was different—and she was right. Fresh orange zest contains volatile oils that give you that bright, almost floral quality that makes people pause and ask what's in these rolls. Bottled zest, by contrast, sits around losing its aromatics and ends up tasting dusty and muted. Zest your oranges the same day you make the dough, or keep it in a small jar in the fridge for a day or two, but don't stock it longer than that.
Storage and Make-Ahead Tricks
These rolls freeze beautifully at two different stages, which is probably my favorite thing about them. You can either freeze them in the baking dish after cutting and before the overnight rise (in that case, let them thaw and rise at room temperature for about 2 hours before baking), or you can bake them completely, cool them, freeze them, and reheat them wrapped in foil at 300°F for about 15 minutes. Either way, you end up with fresh-tasting rolls without the morning stress.
- For a richer flavor, swap half the milk for fresh orange juice in the dough itself—it adds moisture and extra citrus depth.
- A tiny pinch of cardamom in the filling (about 1/4 teaspoon) creates a subtle spiced note that sophisticated palates absolutely love, though it's optional.
- These pair perfectly with strong coffee or Earl Grey tea, and they're equally lovely for breakfast, brunch, or even a special dessert.
 Save to Pinterest
 Making these rolls has taught me that the best recipes are the ones that fit into real life, not the ones that demand perfection. These orange rolls do exactly that—they let you do the work when you have energy, then reward you with something warm and special when you need it most.
Recipe FAQs
- → How do orange zest and juice affect the flavor?
Orange zest adds vibrant citrus oils that brighten the dough, while orange juice in the glaze enhances the tangy sweetness, creating a balanced citrus profile.
- → What is the purpose of refrigerating the rolls overnight?
Chilling the rolls overnight slows yeast activity, allowing the dough to develop deeper flavors and a tender, fluffy texture when baked.
- → Can any other spices be added to enhance flavor?
Cardamom or cinnamon can be sprinkled into the filling for subtle warmth and complexity without overpowering the orange notes.
- → What is the best way to achieve a soft texture?
Kneading the dough until smooth and elastic and allowing proper rising times are key to producing light, tender rolls.
- → How should the glaze be applied?
Drizzle the citrus glaze over the rolls while still warm to allow it to soak in slightly and add a glossy finish.