 Save to Pinterest
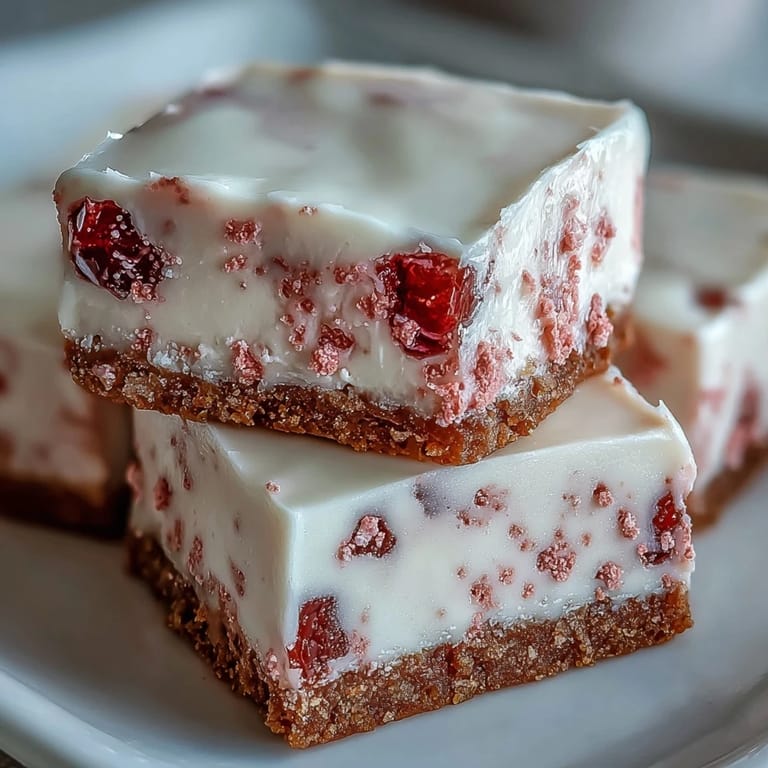
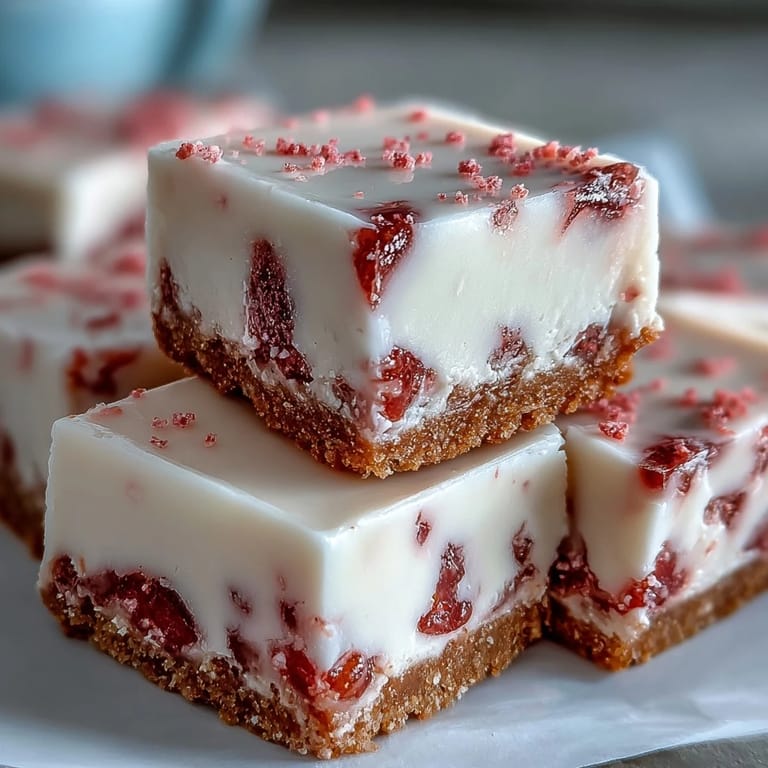
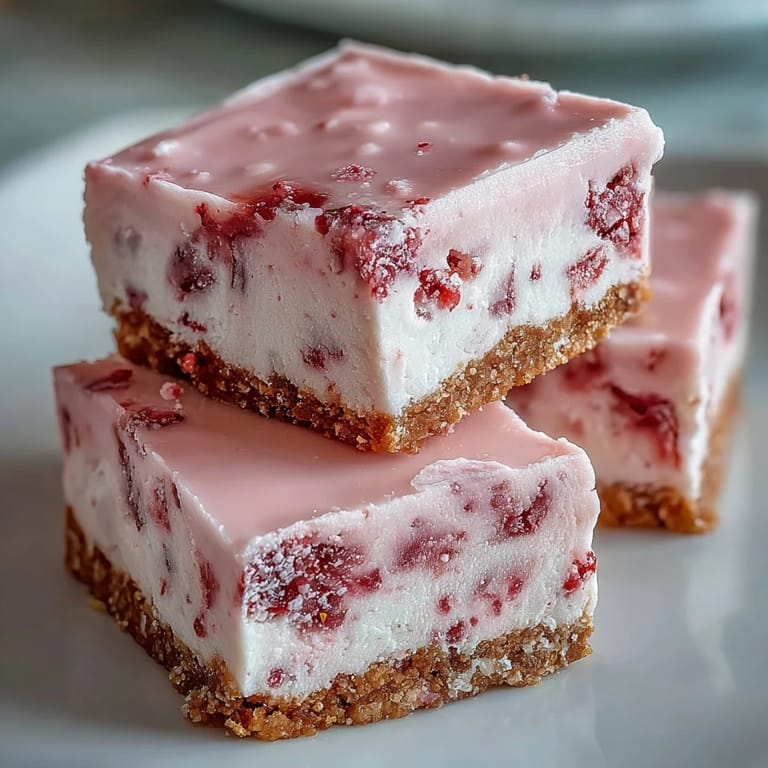
 The smell hit me before I even opened the fridge: sweet, floral, unmistakably strawberry. I'd tucked the tray in late the night before, skeptical that something this pink could taste like anything but sugar. When I peeled back the plastic wrap that morning, the fudge had set into glossy squares that wobbled just slightly when I nudged the pan. One bite proved me wrong—creamy, tangy, with that crunchy base anchoring every mouthful.
I made these for a spring picnic once, and they survived the car ride in a cooler better than any frosted cake ever could. My friend swore they tasted like the strawberry milk she used to beg for as a kid, only grown up and somehow more real. We ate them straight from the container, standing around the trunk, fingers sticky and happy.
Ingredients
- Digestive biscuits or graham crackers (200 g, finely crushed): These form the sturdy base that keeps the fudge from sliding around, and their mild sweetness balances the intense strawberry layer.
- Unsalted butter (100 g, melted): Binds the crumbs into a press-in crust that holds its shape without baking.
- White chocolate chips or chopped white chocolate (200 g): The creamy backbone of the fudge, melting into the condensed milk for that signature smooth texture.
- Sweetened condensed milk (395 g, 1 can): Adds sweetness and body, turning melted chocolate into thick, spoonable fudge.
- Freeze-dried strawberries (50 g, ground to powder): Packs concentrated berry flavor without adding moisture that would stop the fudge from setting.
- Pure vanilla extract (1 tsp): Deepens the sweetness and rounds out the strawberry without competing with it.
- Pinch of salt: Sharpens the fruit flavor and keeps the fudge from tasting flat.
- Pink or red gel food coloring (1 to 2 drops, optional): Boosts the color if you want that Instagram-ready pop, though the strawberries give a natural blush on their own.
Tired of Takeout? 🥡
Get 10 meals you can make faster than delivery arrives. Seriously.
One email. No spam. Unsubscribe anytime.
Instructions
- Prep the pan:
- Line your 20 cm square pan with parchment, letting it hang over two sides like little handles. This trick makes lifting out the set fudge completely foolproof.
- Build the crust:
- Toss crushed biscuits and melted butter in a bowl until every crumb looks damp and clumps when you squeeze it. Press the mixture flat and even into the pan, using the back of a spoon or a flat glass to pack it down tight.
- Chill the base:
- Pop the pan in the fridge for 10 minutes so the crust firms up enough to hold the fudge layer without mixing together.
- Melt the fudge:
- Set a heatproof bowl over a pan of barely simmering water, add white chocolate and condensed milk, and stir slowly until the mixture goes glossy and smooth. Patience here prevents seized chocolate, so keep the heat gentle.
- Add the strawberry:
- Pull the bowl off the heat and fold in strawberry powder, vanilla, salt, and food coloring if using. Stir until the color is even and the powder dissolves completely into the fudge.
- Pour and spread:
- Tip the fudge over the chilled crust and use a spatula to nudge it into every corner. A smooth, level top makes slicing much easier later.
- Set in the fridge:
- Cover loosely with plastic wrap and chill for at least 2 to 3 hours, until the fudge feels firm when you press it lightly with a fingertip.
- Slice and serve:
- Lift the whole slab out using the parchment overhang, set it on a cutting board, and cut into 16 squares with a sharp knife. Wipe the blade between cuts for clean edges, then garnish with fresh or freeze-dried strawberry if you like.
 Save to Pinterest
 There was an afternoon when I brought a tin of these to a neighbor who'd just had a baby, and she texted me later that night to say it was the first sweet thing she'd actually tasted in days, not just swallowed. That little square of pink fudge gave her five minutes of sitting still, and somehow that felt like enough.
Choosing Your Strawberries
Freeze-dried strawberries are my go-to because they grind into a fine, shelf-stable powder that dissolves without adding water. If you go the fresh route, cook the puree down by half on the stove first to concentrate the flavor and evaporate extra liquid, then let it cool completely before stirring it in. I've tried both, and the freeze-dried version sets faster and tastes brighter, but fresh gives you a softer, almost jammy note if that's what you're after.
Storing and Serving
These squares live happily in an airtight container in the fridge for up to five days, stacked between sheets of parchment so they don't stick. I've found they taste best when you pull them out about 10 minutes before serving, just long enough for the fudge to lose that hard chill and turn silky. If you're packing them for a party, nestle them in a shallow container with a lid and keep them cool until the last moment.
Make It Your Own
Once you've nailed the basic formula, it's easy to play. Swap the strawberries for freeze-dried raspberries or mango for a completely different flavor, or fold in white chocolate chips for extra texture. I've stirred crushed freeze-dried raspberries into the fudge just before pouring to get a marbled swirl, and it looked like something from a bakery window.
- Use dairy-free white chocolate and coconut condensed milk for a vegan-friendly version that sets just as well.
- Sprinkle coarse sugar crystals on top before chilling for a bit of sparkle and crunch.
- Press a whole freeze-dried strawberry into the center of each square before they set for an easy, elegant garnish.
 Save to Pinterest
 These little pink squares have a way of disappearing faster than you'd expect, so I always make a double batch now. Keep them tucked in the fridge, and you'll have something sweet and bright ready whenever you need it.
Recipe FAQs
- → Can I use fresh strawberries instead of freeze-dried?
Yes, you can substitute 100g of puréed and strained fresh strawberries for the freeze-dried powder. However, freeze-dried strawberries provide more concentrated flavor and won't add excess moisture to the fudge layer.
- → How long do these squares need to chill?
The fudge layer requires at least 2-3 hours of refrigeration to set properly. For best results, allow the full 3 hours or chill overnight for firmer squares that are easier to cut cleanly.
- → Can I make these dairy-free?
Absolutely. Use dairy-free white chocolate chips and coconut condensed milk in place of regular condensed milk. Substitute the butter in the crust with coconut oil or dairy-free margarine for a completely dairy-free version.
- → What's the best way to cut clean squares?
Use a sharp knife and wipe the blade clean with a warm, damp cloth between each cut. Letting the fudge sit at room temperature for 5-10 minutes before slicing also helps achieve cleaner edges.
- → How should I store leftover squares?
Store the squares in an airtight container in the refrigerator for up to 5 days. Layer parchment paper between stacked squares to prevent them from sticking together. They can also be frozen for up to 2 months.
- → Can I adjust the strawberry flavor intensity?
Yes, you can increase or decrease the amount of freeze-dried strawberry powder to suit your taste. Start with the recommended 50g and add more for a stronger berry flavor, or reduce slightly for a more subtle taste.